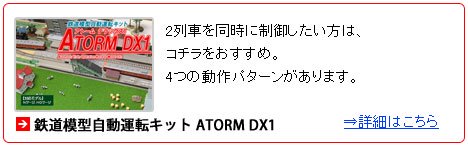
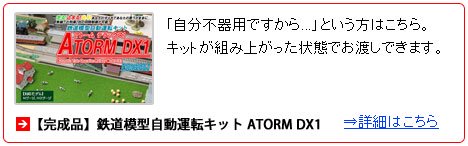
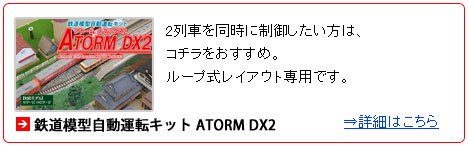
当キットは、鉄道模型自動運転キット『ATORM』のバージョンアップ版、『ATORM DX』の単線ループレイアウト版です。2列車を同時に制御ができ、線路の切り替えポイントの制御もできるようになっていますので、単線で同時に2列車を動かすことができ、使用できるレイアウトの幅が広がります。また最新Verでは、模型用鉄道信号機キットと連動可能になりました。
*お得な模型用鉄道信号機キット(3灯×2組制御 ATORM用)もございます。
鉄道模型自動運転システム ATORM とは
鉄道模型を自動で制御して走行させる事が出来るシステムです。模型車両を多くコレクションしている方でも気軽に走らせる事が出来る様、車両は市販の標準状態で入線出来ます。DCC等の様な組み込みや改造は不要なので、沢山の車両を保有していても安心です。
・標準状態の車両はNゲージなどのDC12Vで車両に動力のモーター、室内灯、前尾照灯などが装備された車両になります。(最低モーターがあれば運転可能です)

家庭でのレイアウトに丁度良いシステム
他社の自動運転システムの様な拡張性はありませんが、鉄道博物館などの巨大なジオラマや集合式レイアウトでもなければ大抵の家庭のレイアウトは駅が2、3程度ではないでしょうか。ATORMは家庭でのレイアウトで扱いやすい様、運転パターンを限定し、設定も簡単にしました。
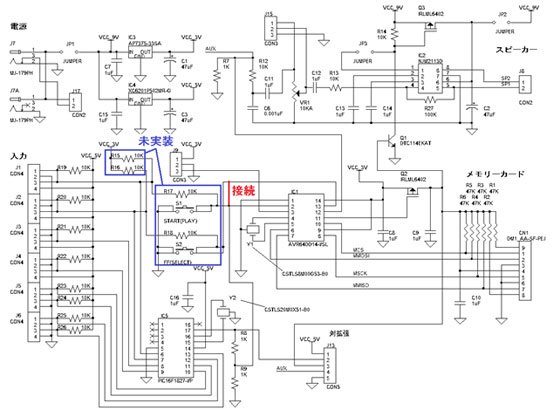
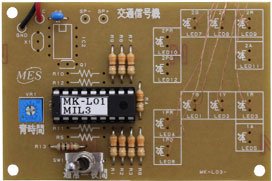
新機能追加 信号機制御に対応
模型用鉄道信号機キットと接続し、出発信号機や場内信号機の演出が可能になりました。これにより駅のリアルな情景も再現可能になります。
・信号機を使用する場合は減速センサーの使用を推奨します。よりリアルに動作します。

より使い勝手が良くなる改良点
減速センサーから減速して停止センサーで駅に停車する時の減速率を大きくし、停車位置を合わせ易くしました。加速率をゆっくりにすると停車位置がオーバーランする悩みも低減できます。


|
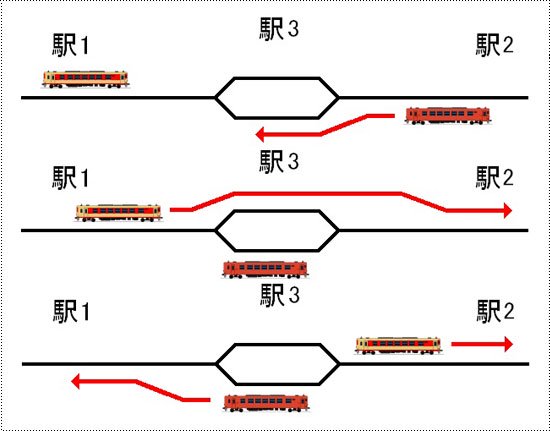
弊社の鉄道模型自動運転キット【ATORM】では、1列車のみの制御となっていました。【ATORM DX2】は2列車の制御が1つのキットで可能になります。また、単線での2列車の運用が可能になりました。お持ちのレイアウトにあった動作パターンをお選びいただき、よりリアルに臨場感あふれるレイアウトに仕上げてみてはいかがでしょうか。
|

|
【ATORM DX2】ではポイントの切り替えを自動で制御できるようになりました。
使用できるポイントについて
本キットでは2線式のものが使用できます。従来の3線式は使用できません。また、両渡りポイントなど、複数の先端軌条を動かすポイントは対応出来ない場合があります。単独のポイントを使用してください。
|
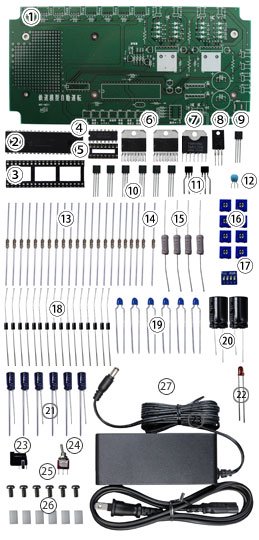
※完成品はすべて、ご注文後の製作になります。
また、銀行振込の場合は入金確認後からの製作開始となります。
製作期間は、製作開始から1〜2週間程掛かります。
完成品はデリケートな為、配送方法はレターパックプラスではなく
ゆうパックをお選びください。
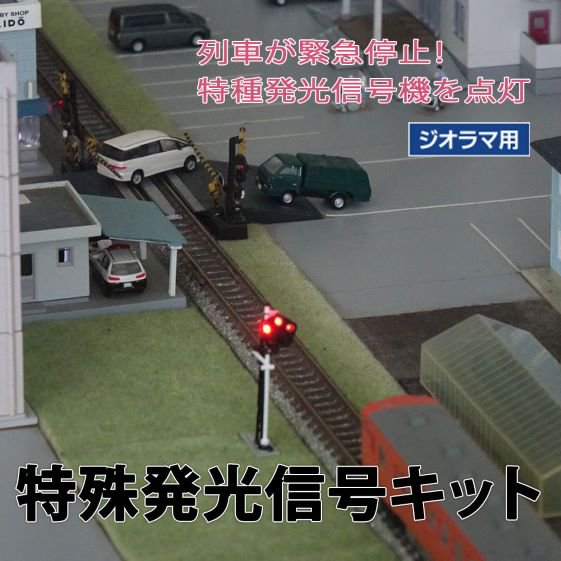
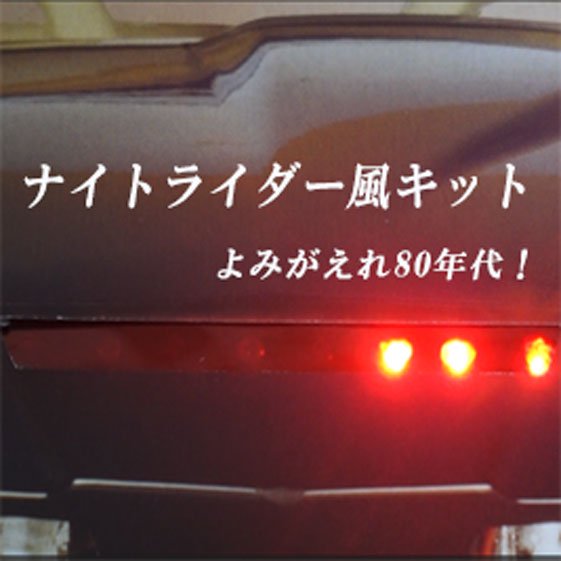
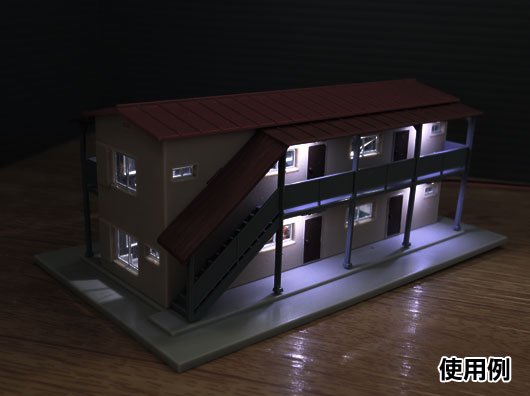
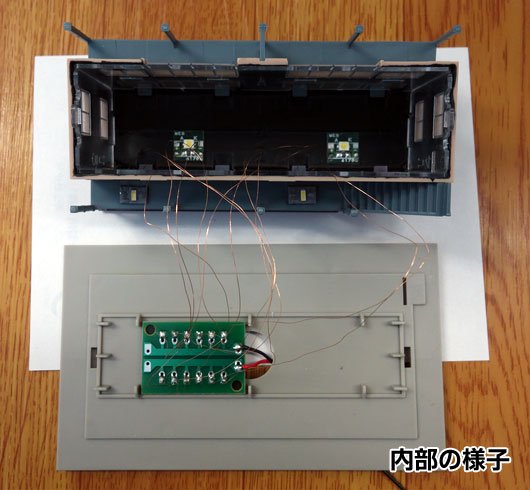
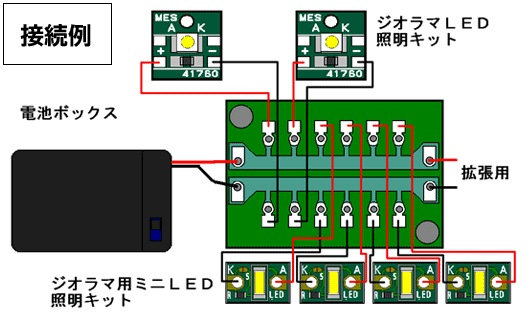
夜景も再現できます
ATORMではLED室内灯を組み込んだ車両を停車中点灯させる事が出来ます。又、夜景に対応出来る車両センサーやハルLEDを組み込んだ建物と合わせる事で夜の鉄道風景を演出可能です。
・TOMIX常点灯、マイクロエース室内灯で点灯。KATOのLED室内灯でも停車中点灯効果があります(明るさの若干の変動はあります)。コアレスモーターの機関車と組み合わせた場合に停車中点灯の効果を発揮出来ない場合があります。

なりきり発車ベルに接続可能
『なりきり発車ベルキット・ボリューム調整機能付き』を接続して自動で発車ベルを鳴らす事が可能です。
・発車ベルは運転パターンにより鳴らせる駅が限定されます。又、信号機制御と排他使用となります。
車両センサーは選択可能
Nゲージ、HOゲージなど、様々な条件のレイアウトに使用出来る様、車両センサーは各種選択可能。後付けでCDSセンサー、夜景が再現出来る反射式センサー、TCSセンサーも改造で使えます。一部の運転パターンを除いて、停車センサーを使用しなくても運転可能です。停車位置の精度や予算に合わせて選択可能です。
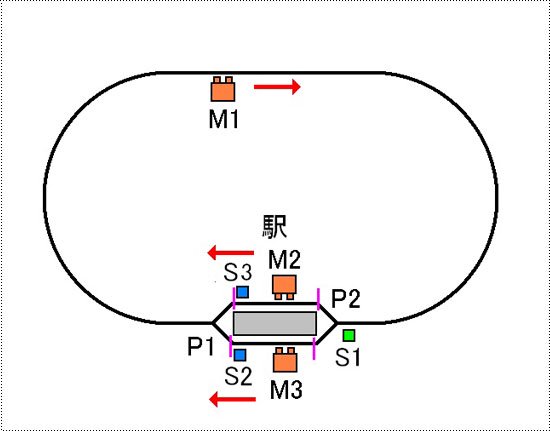
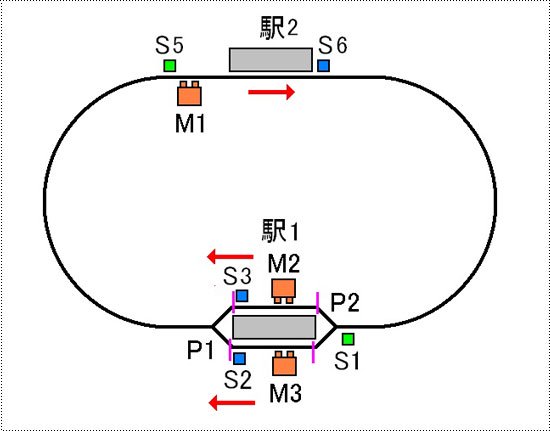
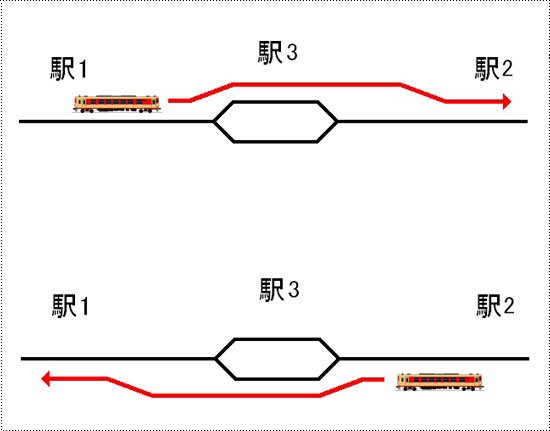
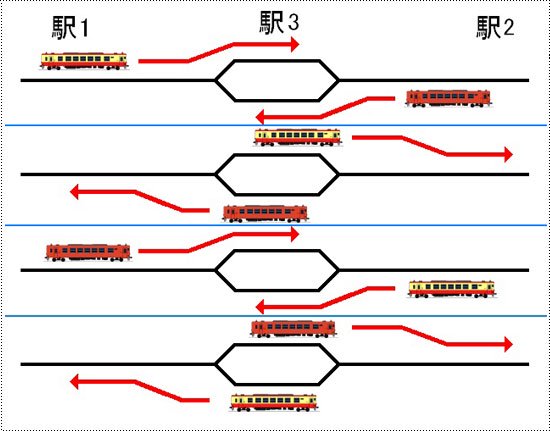
駅からM2側に停車している電車が発車し、ループして駅のM2側に停車します。次にM3側に停車している電車が発車し、ループして駅のM3側に停車します。以上の動作を繰り返します。
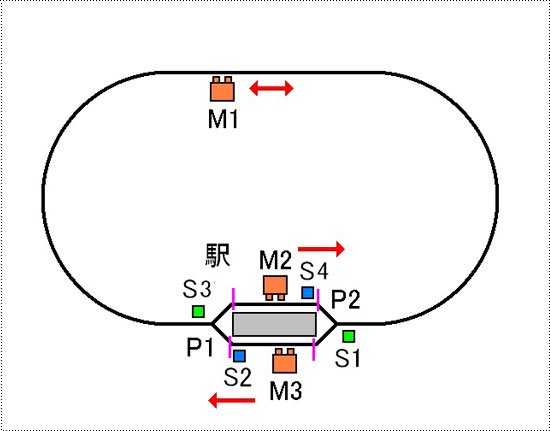
駅からM2側に停車している電車が発車し、右方向にループして駅のM2側に停車します。次にM3側に停車している電車が発車し、M2側とは逆に左方向にループして駅のM3側に停車します。以上の動作を繰り返します。
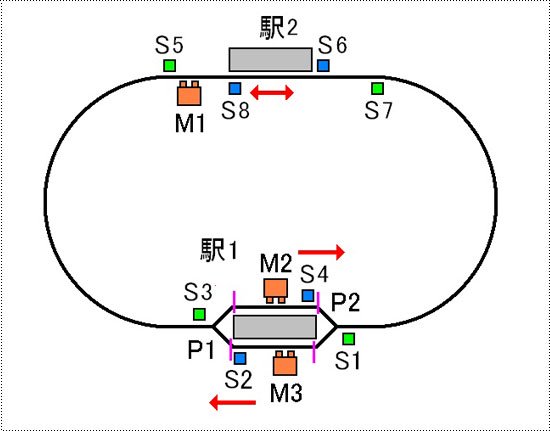
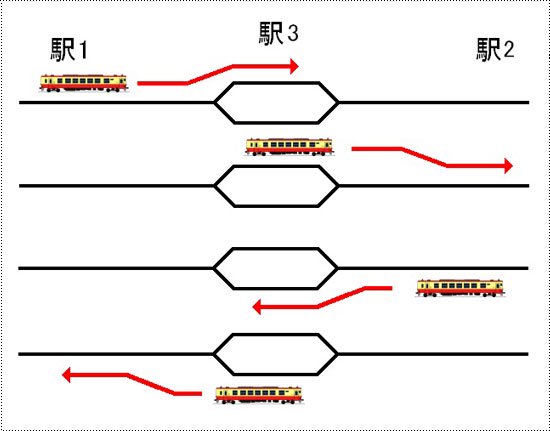
駅1からM2側に停車している電車が発車し、ループする途中で駅2に停車します。一定時間停車後して駅1にむかい駅のM2側に停車します。次にM3側に停車している電車が発車し、ループする途中で駅2に停車します。一定時間停車後して駅1にむかい駅のM3側に停車します。以上の動作を繰り返します。
駅1からM2側に停車している電車が右方向に発車し、ループする途中で駅2に停車します。一定時間停車後して駅1にむかい駅のM2側に停車します。次にM3側に停車している電車がM2側とは逆に左方向に発車し、ループする途中で駅2に停車します。一定時間停車後して駅1にむかい駅のM3側に停車します。以上の動作を繰り返します。
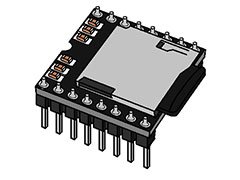
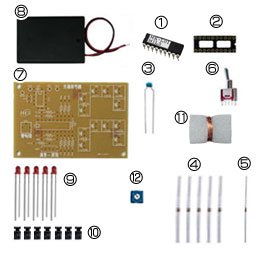
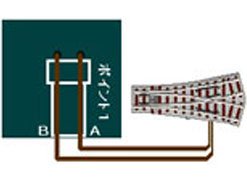
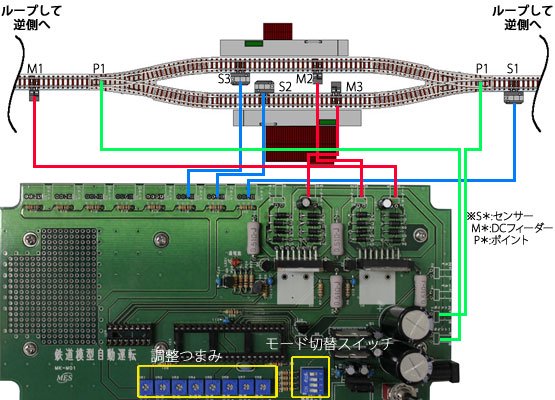
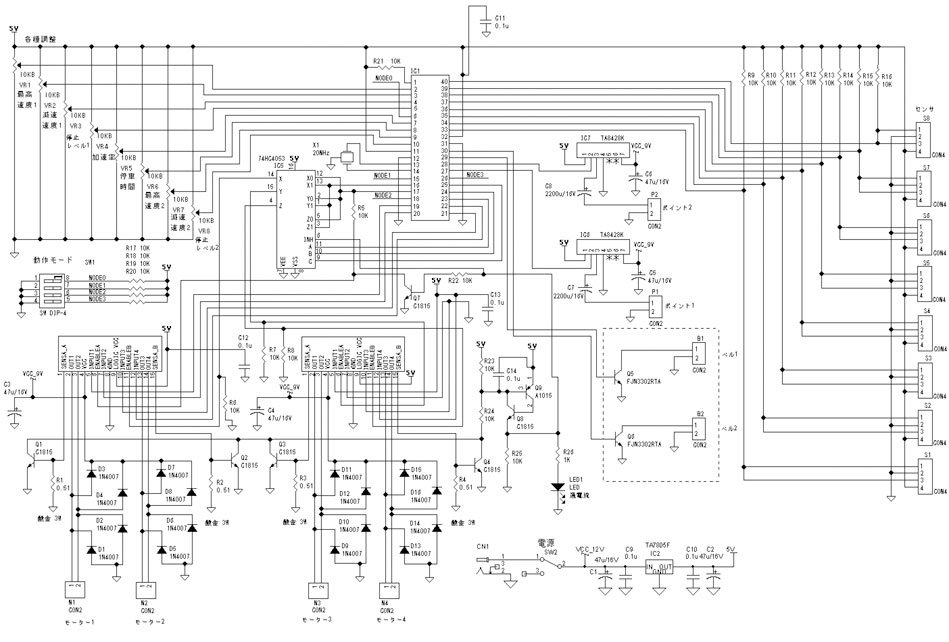
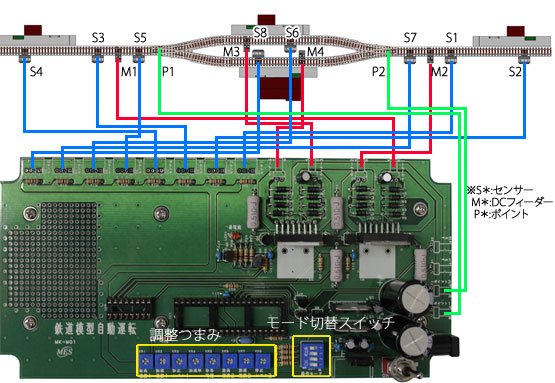
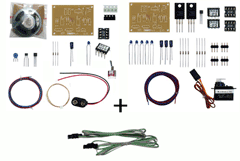
本キットは最大8つのセンサーと4つのDCフィーダー及び2つのポイントを接続して使用します。
下図はAパターンの動作に適したセンサーの配線図です。
動作については『本キットの動作』を参照して下さい。
各ポイントと各センサーの位置でタイミングを調整して設置して下さい。
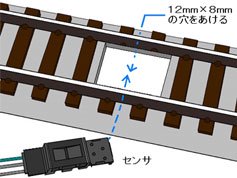
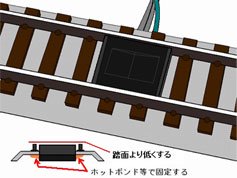
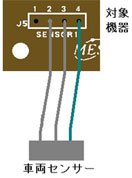
本キットは接点入力(リードスイッチ等)、TCSセンサー又は弊社、車両センサーユニット各種を以下の様に接続して使用します。
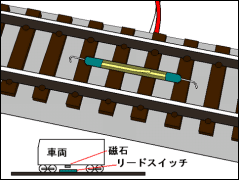
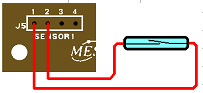
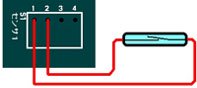
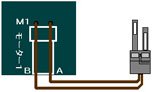
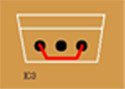
?リードスイッチの場合
本キットのセンサー1,2の端子にリードスイッチを接続して下さい。
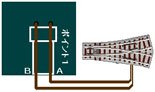
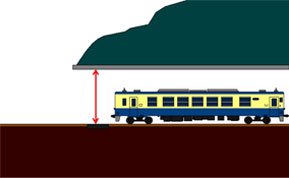
リードスイッチを線路に設置し、車両に磁石を取り付ける事で検知します。(右図参照)
磁石とリードスイッチの取り付け方向と距離を調整して下さい。
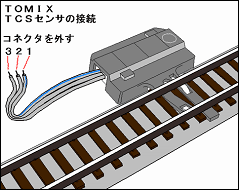
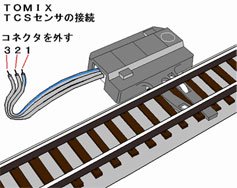
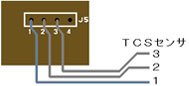
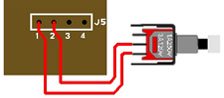
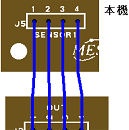
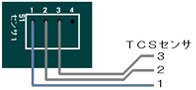
?TOMIX TCSセンサーの場合
TCSセンサーのケーブルからコネクタを外して先バラにします。(右図参照)
本キットのセンサー1,2,3の各端子に右図に対応するケーブルを接続して下さい。
尚、本キットではTCSセンサの方向別検知に対応していませんのでセンサーはどちら向きでも良いです。
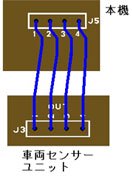
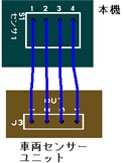
?弊社 車両センサーユニット(オプション)の場合
本キットのJ1〜J4の各端子を車両センサーユニット(CDS式・軌道回路式・反射式)のOUT1〜4にそれぞれ接続して下さい(*反射式はOUT2〜4)。
各センサーとの接続は車両センサーユニットの説明書をご覧下さい。
?DCフィーダーの接続
本キットのM1〜M4端子にDCフィーダーのコードを接続して下さい。
?ポイントとの接続
本キットのP1、P2端子にポイントマシンのコードを接続して下さい。
そなえつけの可変抵抗を調整することにより、停車時間の調整などが出来ます。
| VR1・VR6 |
最高速度 |
発車後の速度 |
| VR2・VR7 |
減速速度 |
減速センサー通過後の速度 |
| VR3・VR8 |
停止レベル |
停車中電灯の明るさ |
| VR4 |
加速率 |
加速・減速の度合い |
| VR5 |
停車時間 |
駅での停車時間 |
 ]]>
]]>


 ]]>
]]>


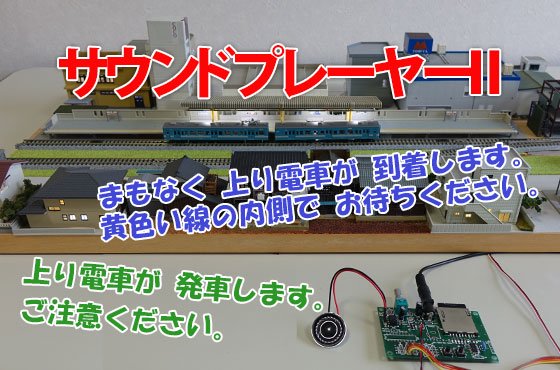

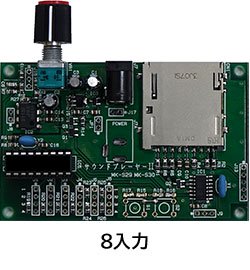
 車両センサーを使って到着アナウンスを自動化出来ます
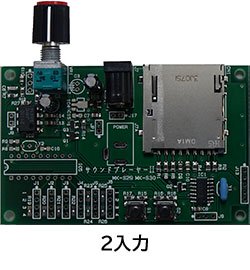
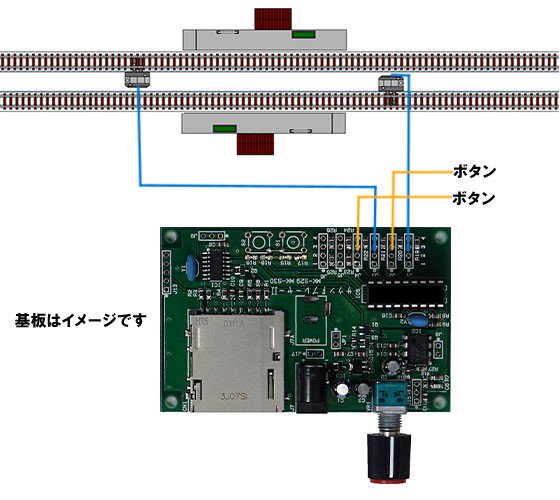 上下線に各、到着アナウンス、発車アナウンス…(『2入力』だと片線分)